We believe empowering engineers drives innovation.
We believe empowering engineers drives innovation.

Integrating Azure Active Directory (AD), now called Microsoft Entra ID Connect, and AWS IAM Identity Center to enable single sign-on (SSO) can be a long and unclear process. One of the necessary steps in this process is configuring Azure AD to send information to AWS IAM Identity Center that it requires, when the two exchange information (referred to as provisioning in Azure AD). If this step is not performed correctly, provisioning will fail. While performing this process on a recent client project, I did not find much information on how to configure the connection with the required information.
The purpose of this article is to assist cloud engineers with this step in the process. The initial part of setting up an object known as Enterprise Application in Azure AD and creating at least one user to provision, will not be covered in this article, as there are multiple tutorials online explaining this. Note that this will require admin privileges in both the AWS and Azure consoles. Sensitive information, like account numbers, access keys, etc. have been redacted for security purposes.
Security Assertion Markup Language (SAML) 2.0 is an XML-based open standard for communicating authentication and authorization information between identity providers and service providers. One of its most common uses is to enable SSO. Attributes and Claims are key/value pairs provided in SAML 2.0 assertions. They are used to exchange information about users or groups, such as usernames, first and last names, email addresses, and other information that may be documented in active directory. They can also contain information regarding what resources users and groups should have access to on a network, thus enabling Attribute Based Access Control (ABAC).
AWS IAM Identity Center requires that an external identity provider includes a few specific attributes in a SAML assertion in order for users and groups to be properly provisioned. Sometimes Azure AD does not provide all of these attributes by default when an enterprise application is set up. If that is the case, they can be added manually. If any of these attributes and claims are not presented by Azure AD to AWS during provisioning, the process will fail. For example, if the “name” attribute is missing, as it was during our initial set up, you should receive an error message similar to the following:
"errorCode": "ValidationException",
"errorMessage": "name": "The attribute name is required"
A post in which a user resolved this error can be found here:
Below is the list of AWS required attributes and their corresponding Azure AD attributes:
| AWS Required Attribute | Corresponding Azure AD Attribute |
|---|---|
| name | user.displayname or user.userprincipalname |
| firstname | user.givenname |
| lastname | user.surname |
| preferredUsername | user.displayname or user.userprincipalname |
| user.mail | |
| Unique User Identifier | user.userprincipalname |
Links to a few articles containing supporting information are below. However, it is important to point out that some of these articles address the integration of AWS IAM Identity Center with Microsoft Active Directory, not Azure Active Directory. Since there are differences between Microsoft Active Directory and Azure Active Directory, it was discovered during this project that all of the attributes and claims mentioned in these articles were not necessary and some had different names. Additionally, the articles that did deal with the integration of Azure AD with AWS IAM Identity center, did not contain all of the required attributes and claims. Trial and error revealed that the SAML attributes required to get users and groups to properly provision, are the ones in the table above.
The presence of these attributes can be verified by:
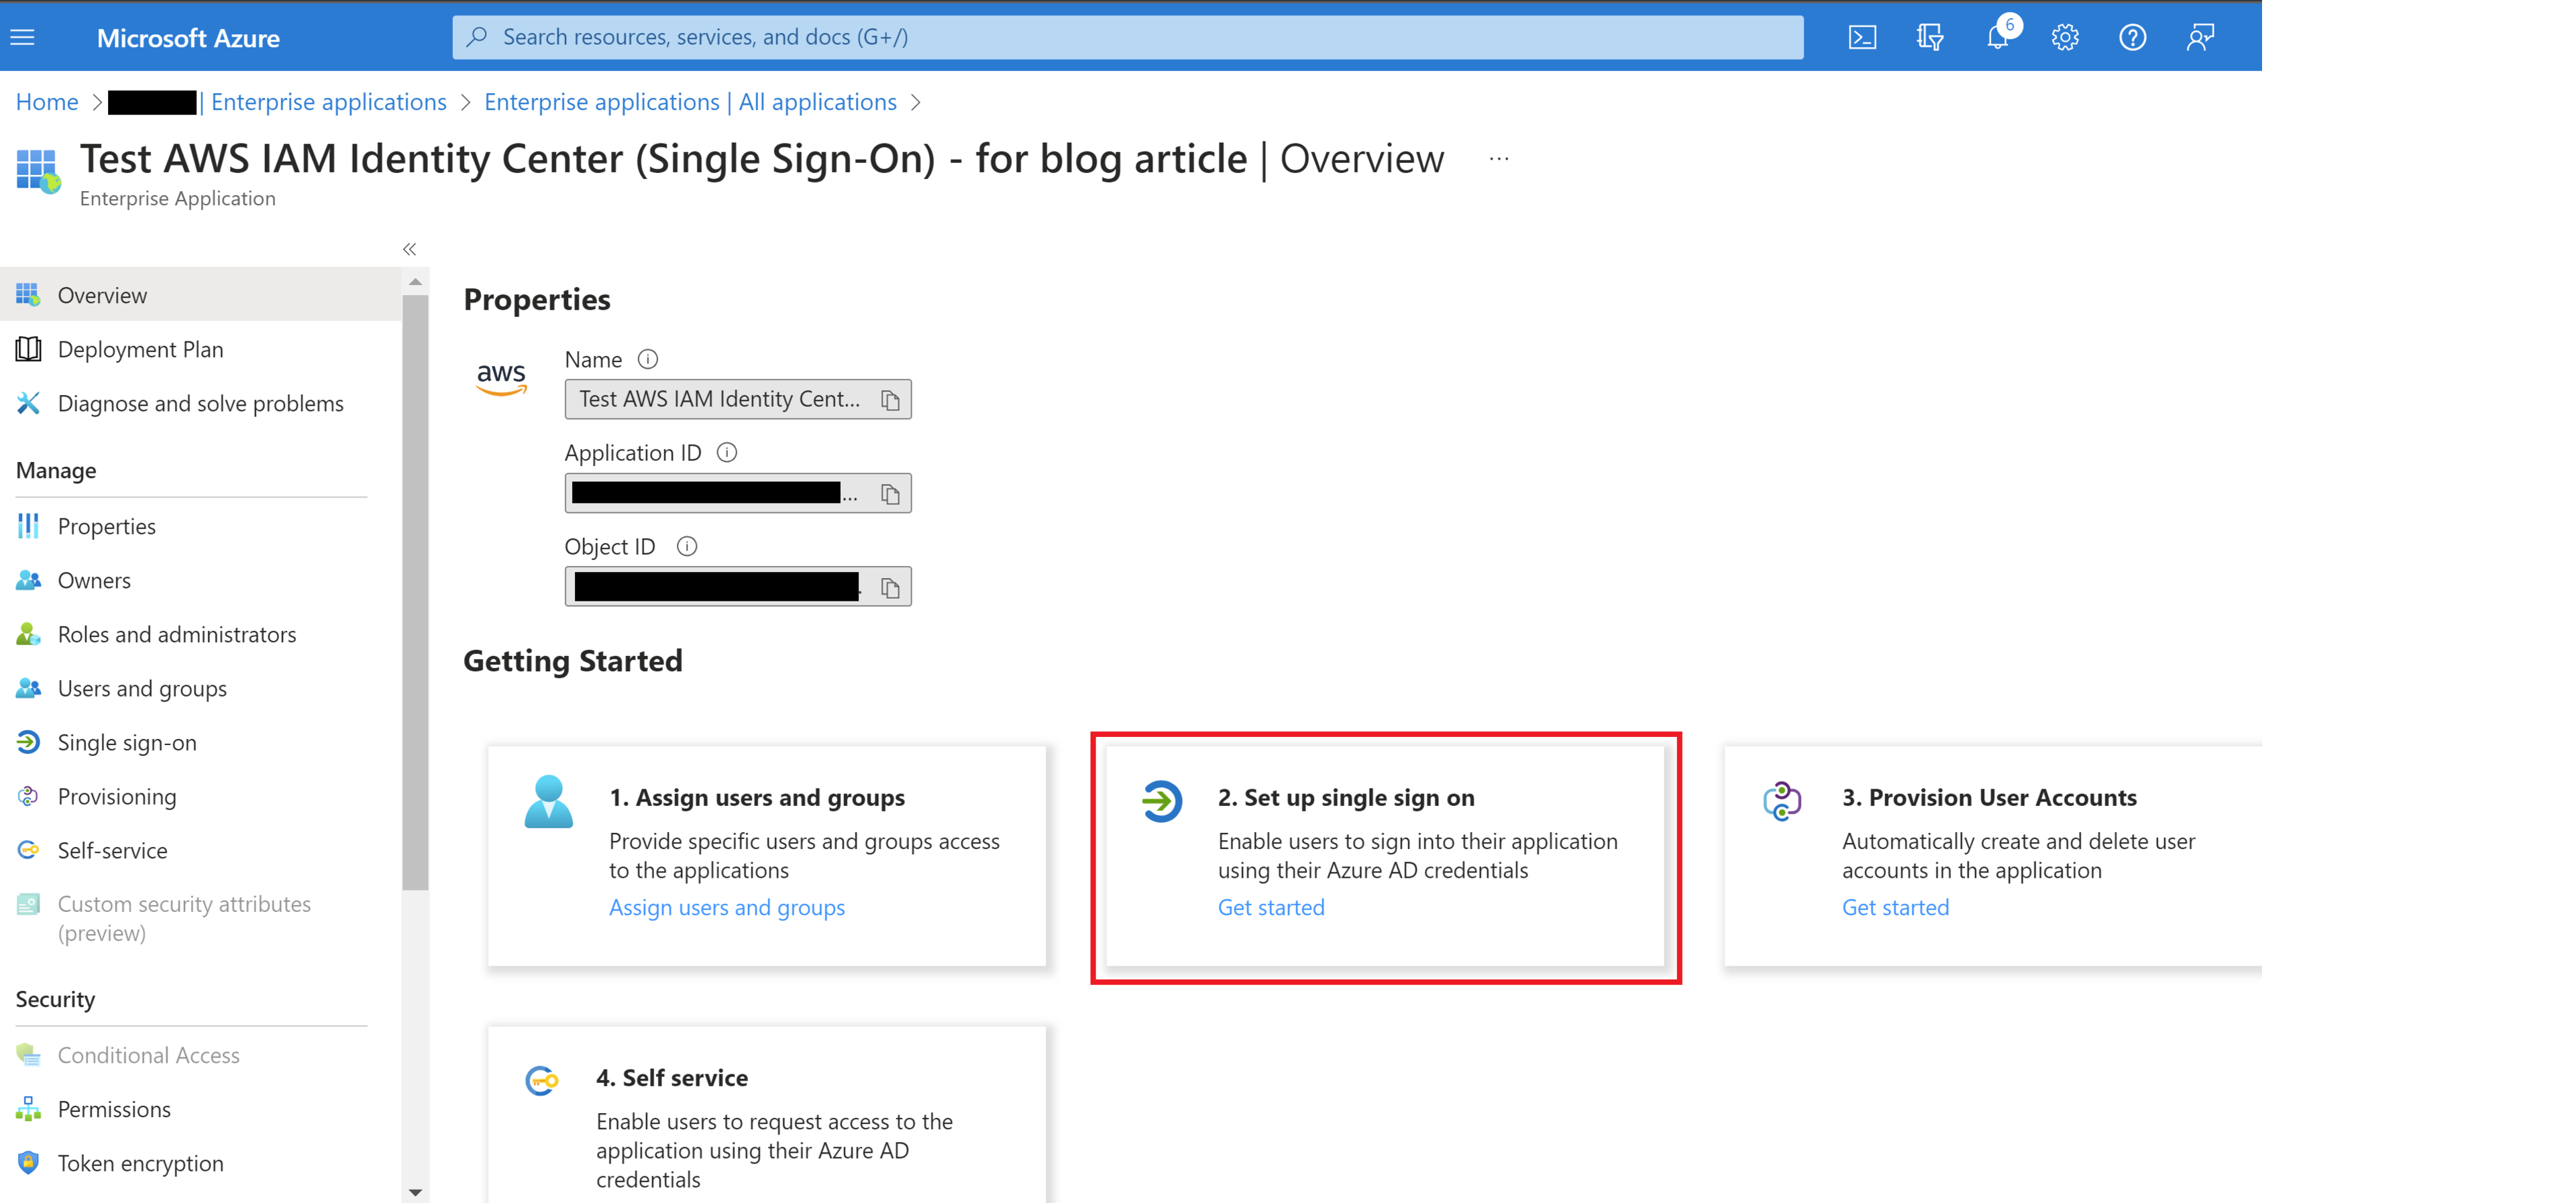
Going to the Enterprise Application previously set up.
Then go to step 2 “Set up single sign on”.
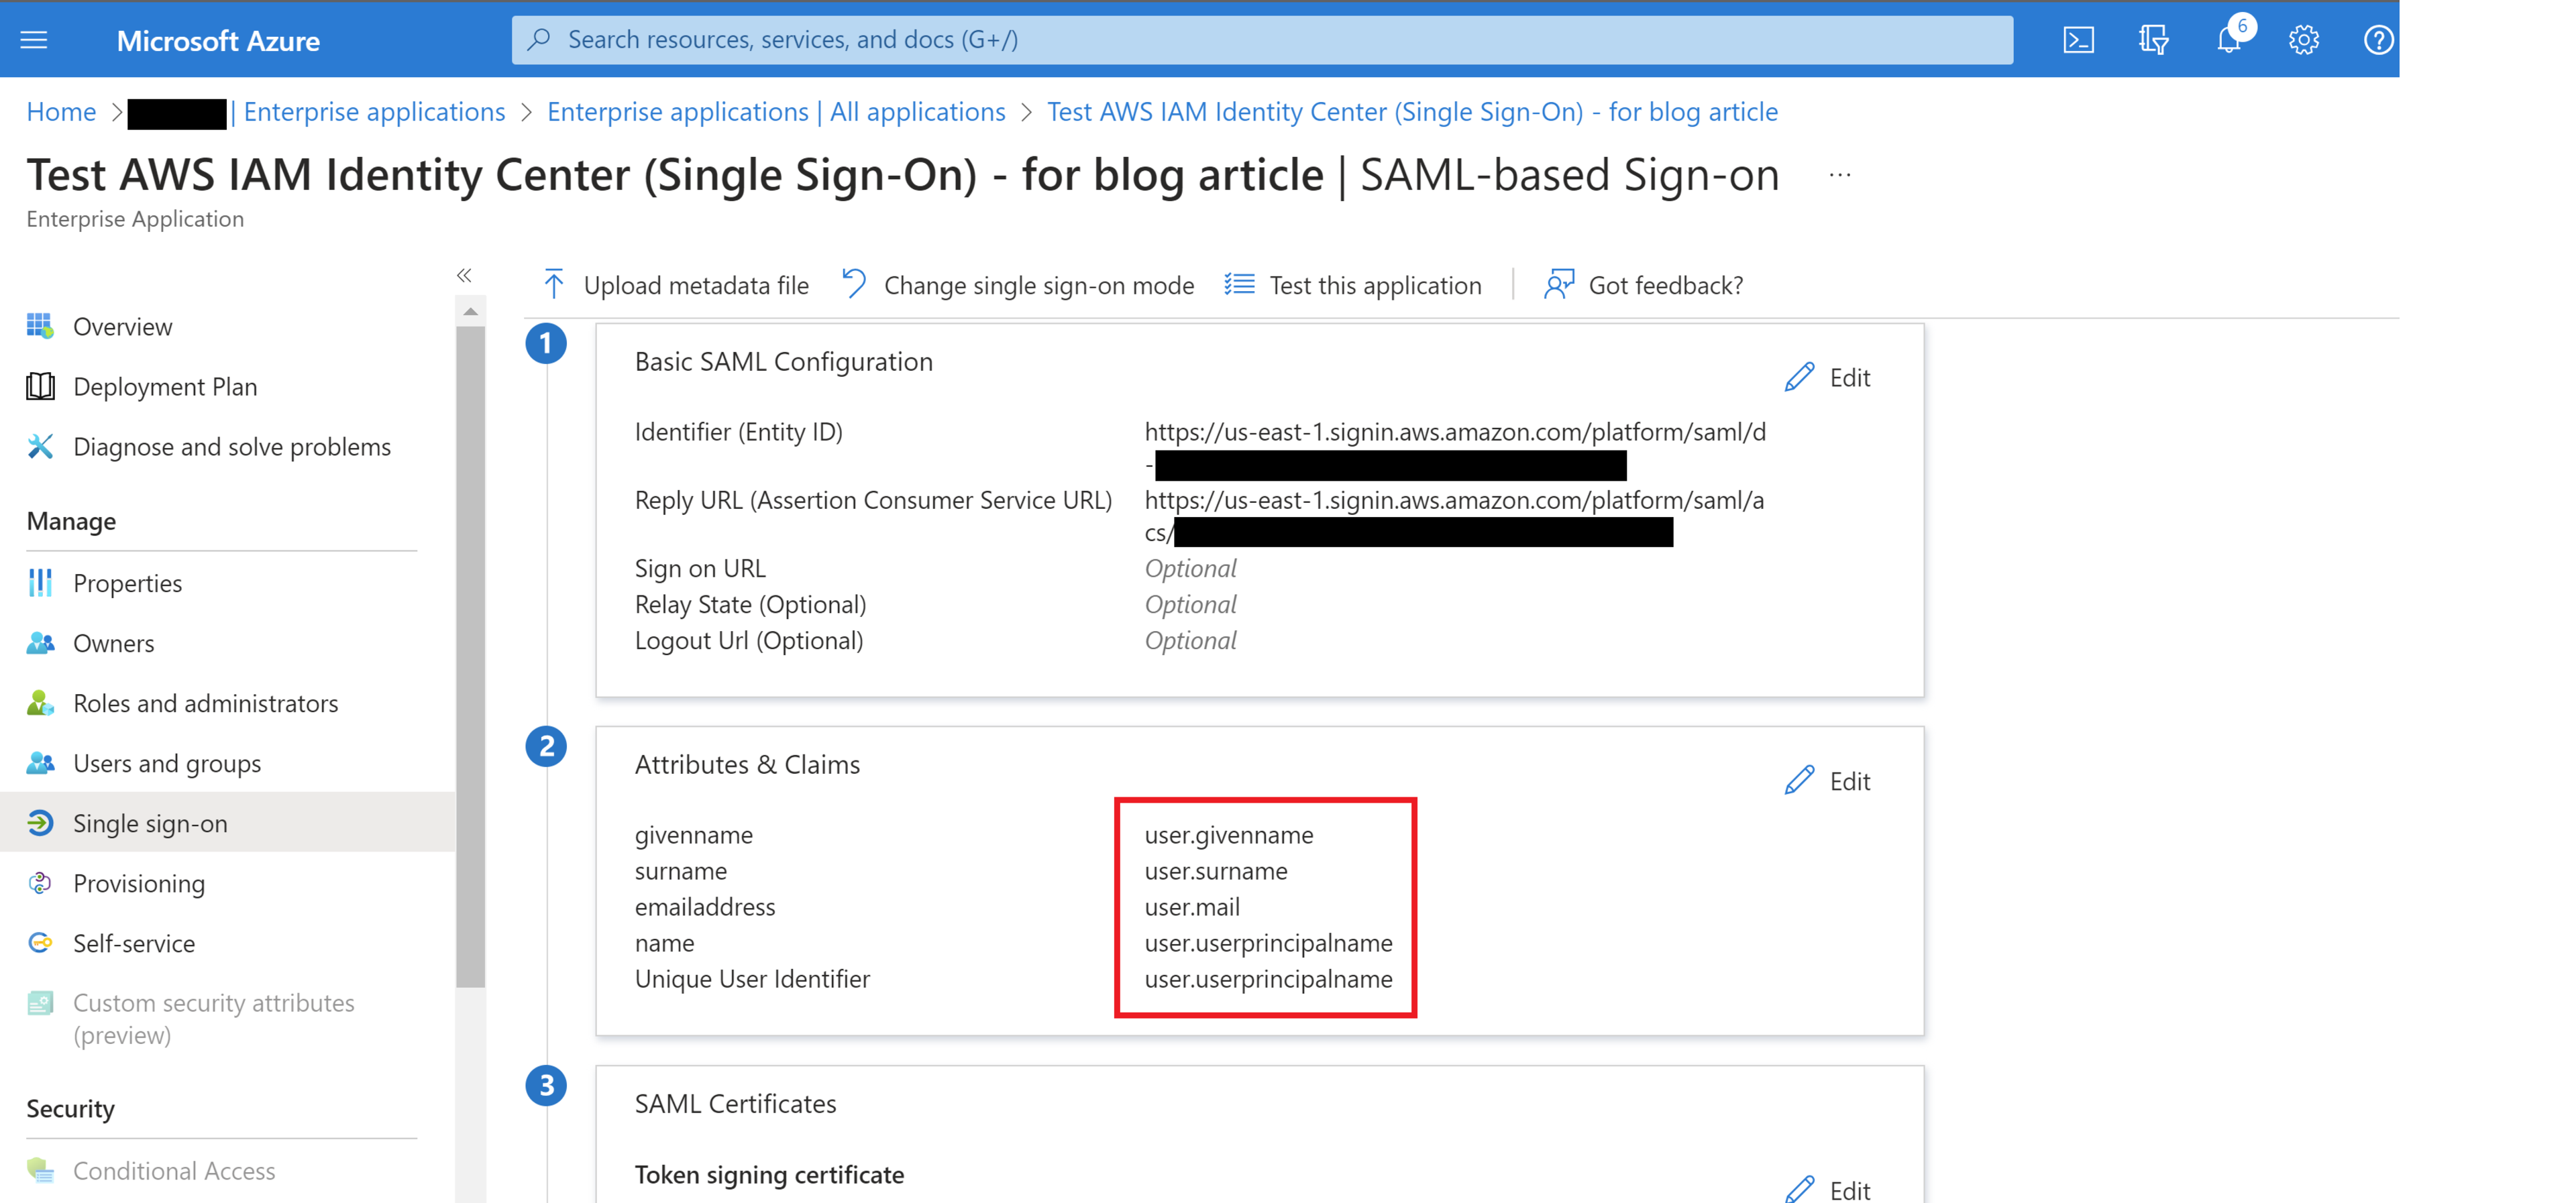
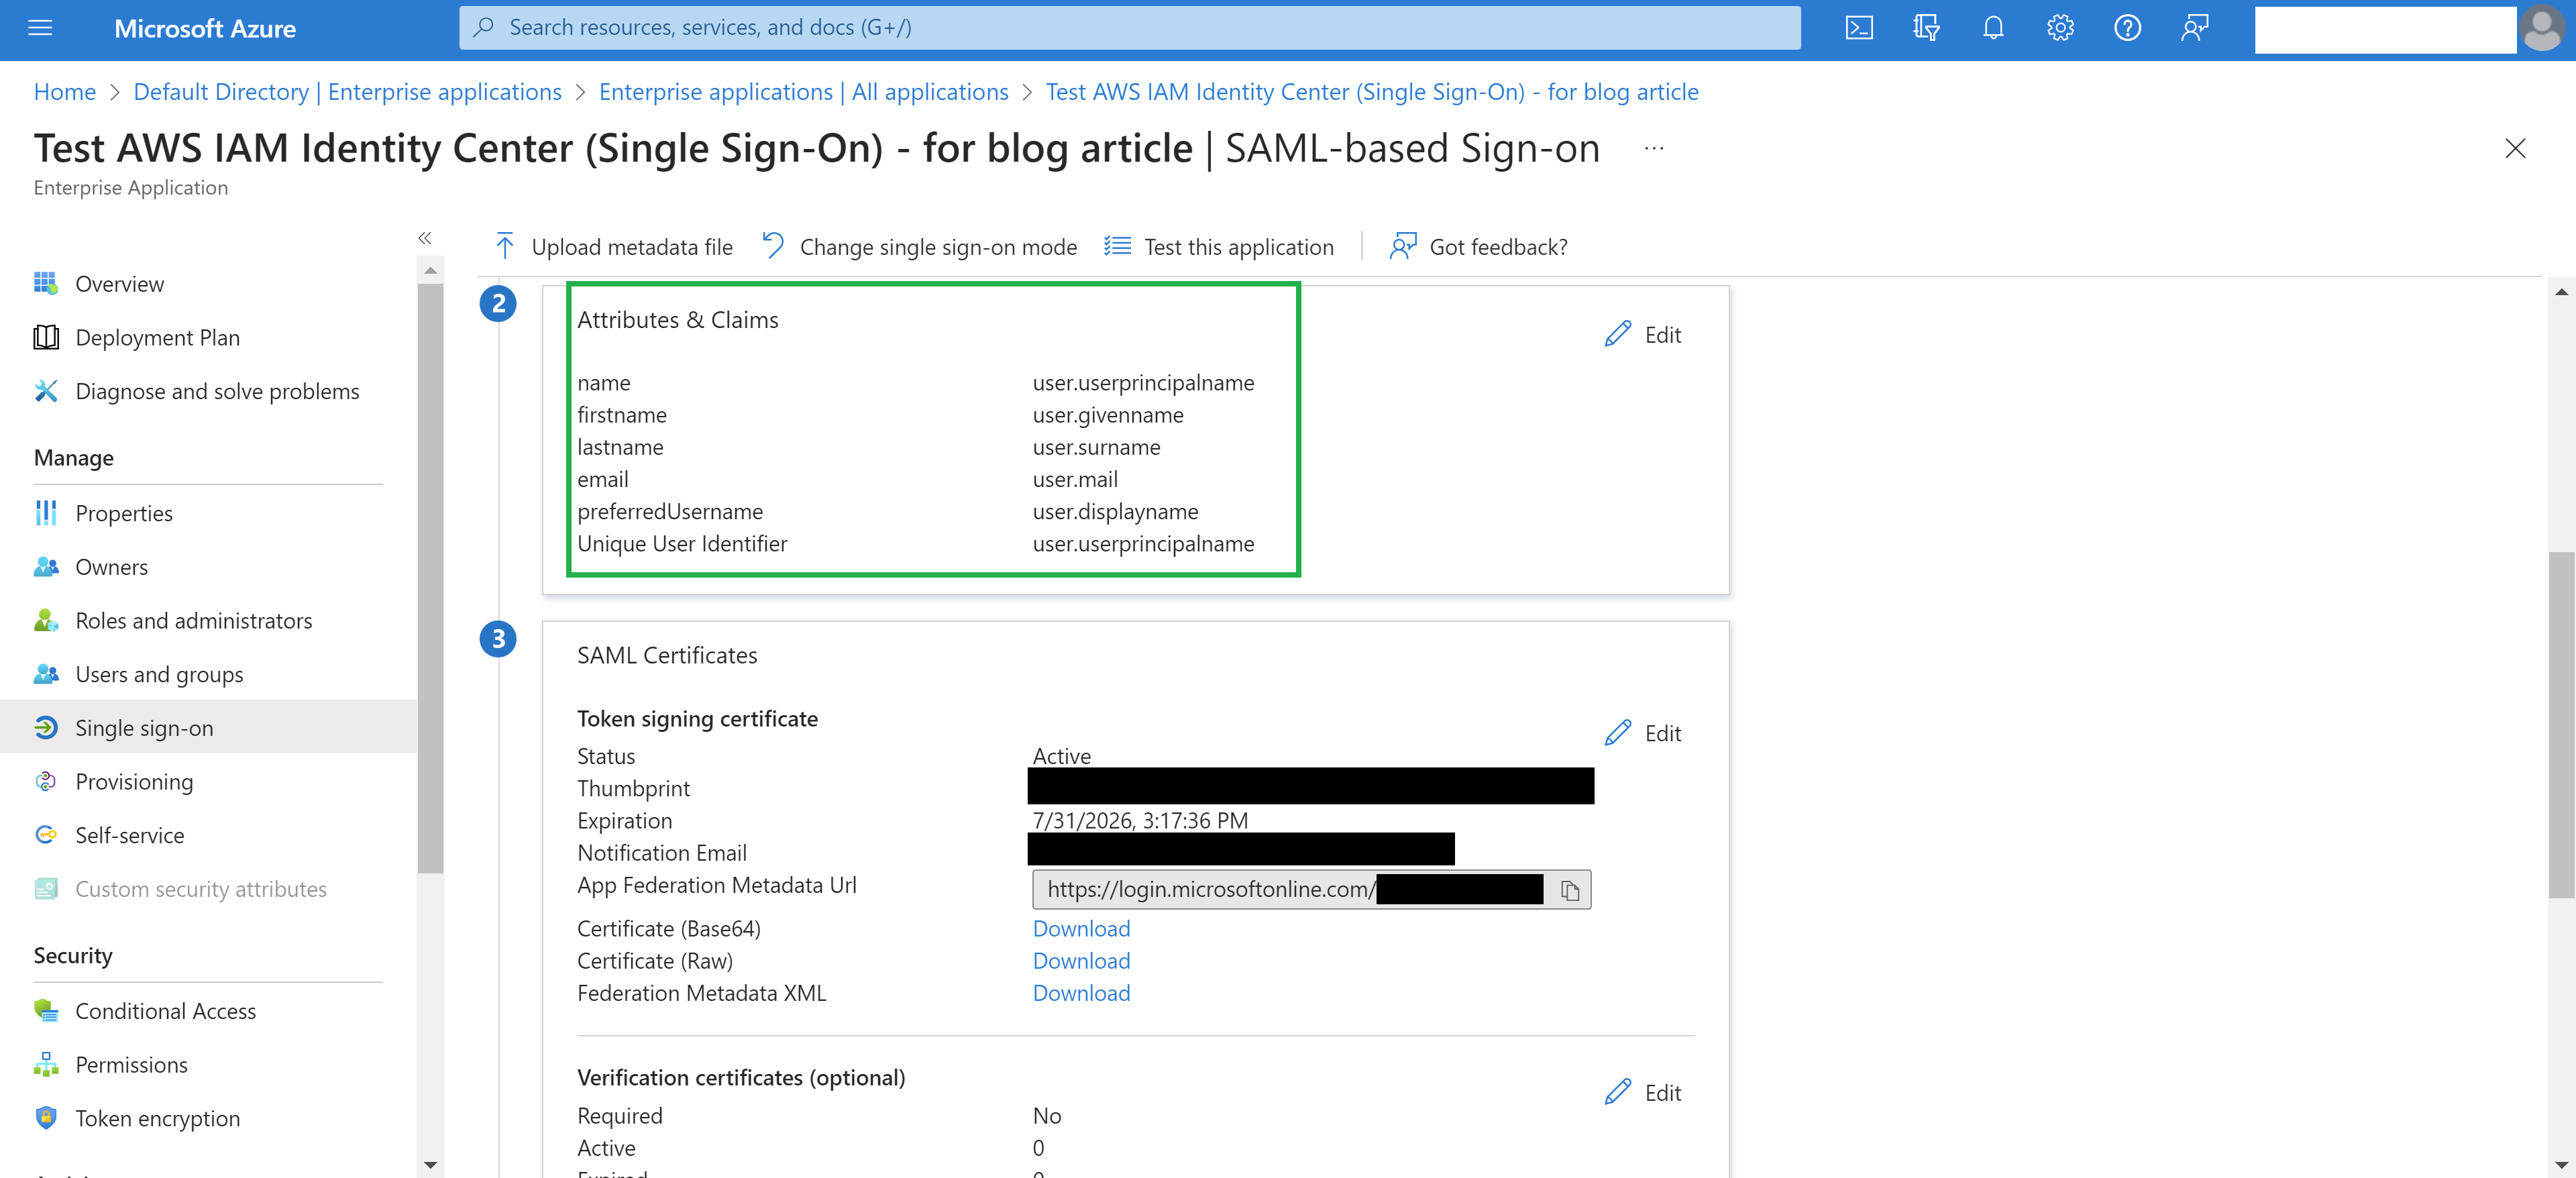
In section 2 “Attributes & Claims”, verify that the attributes in the above table are present.
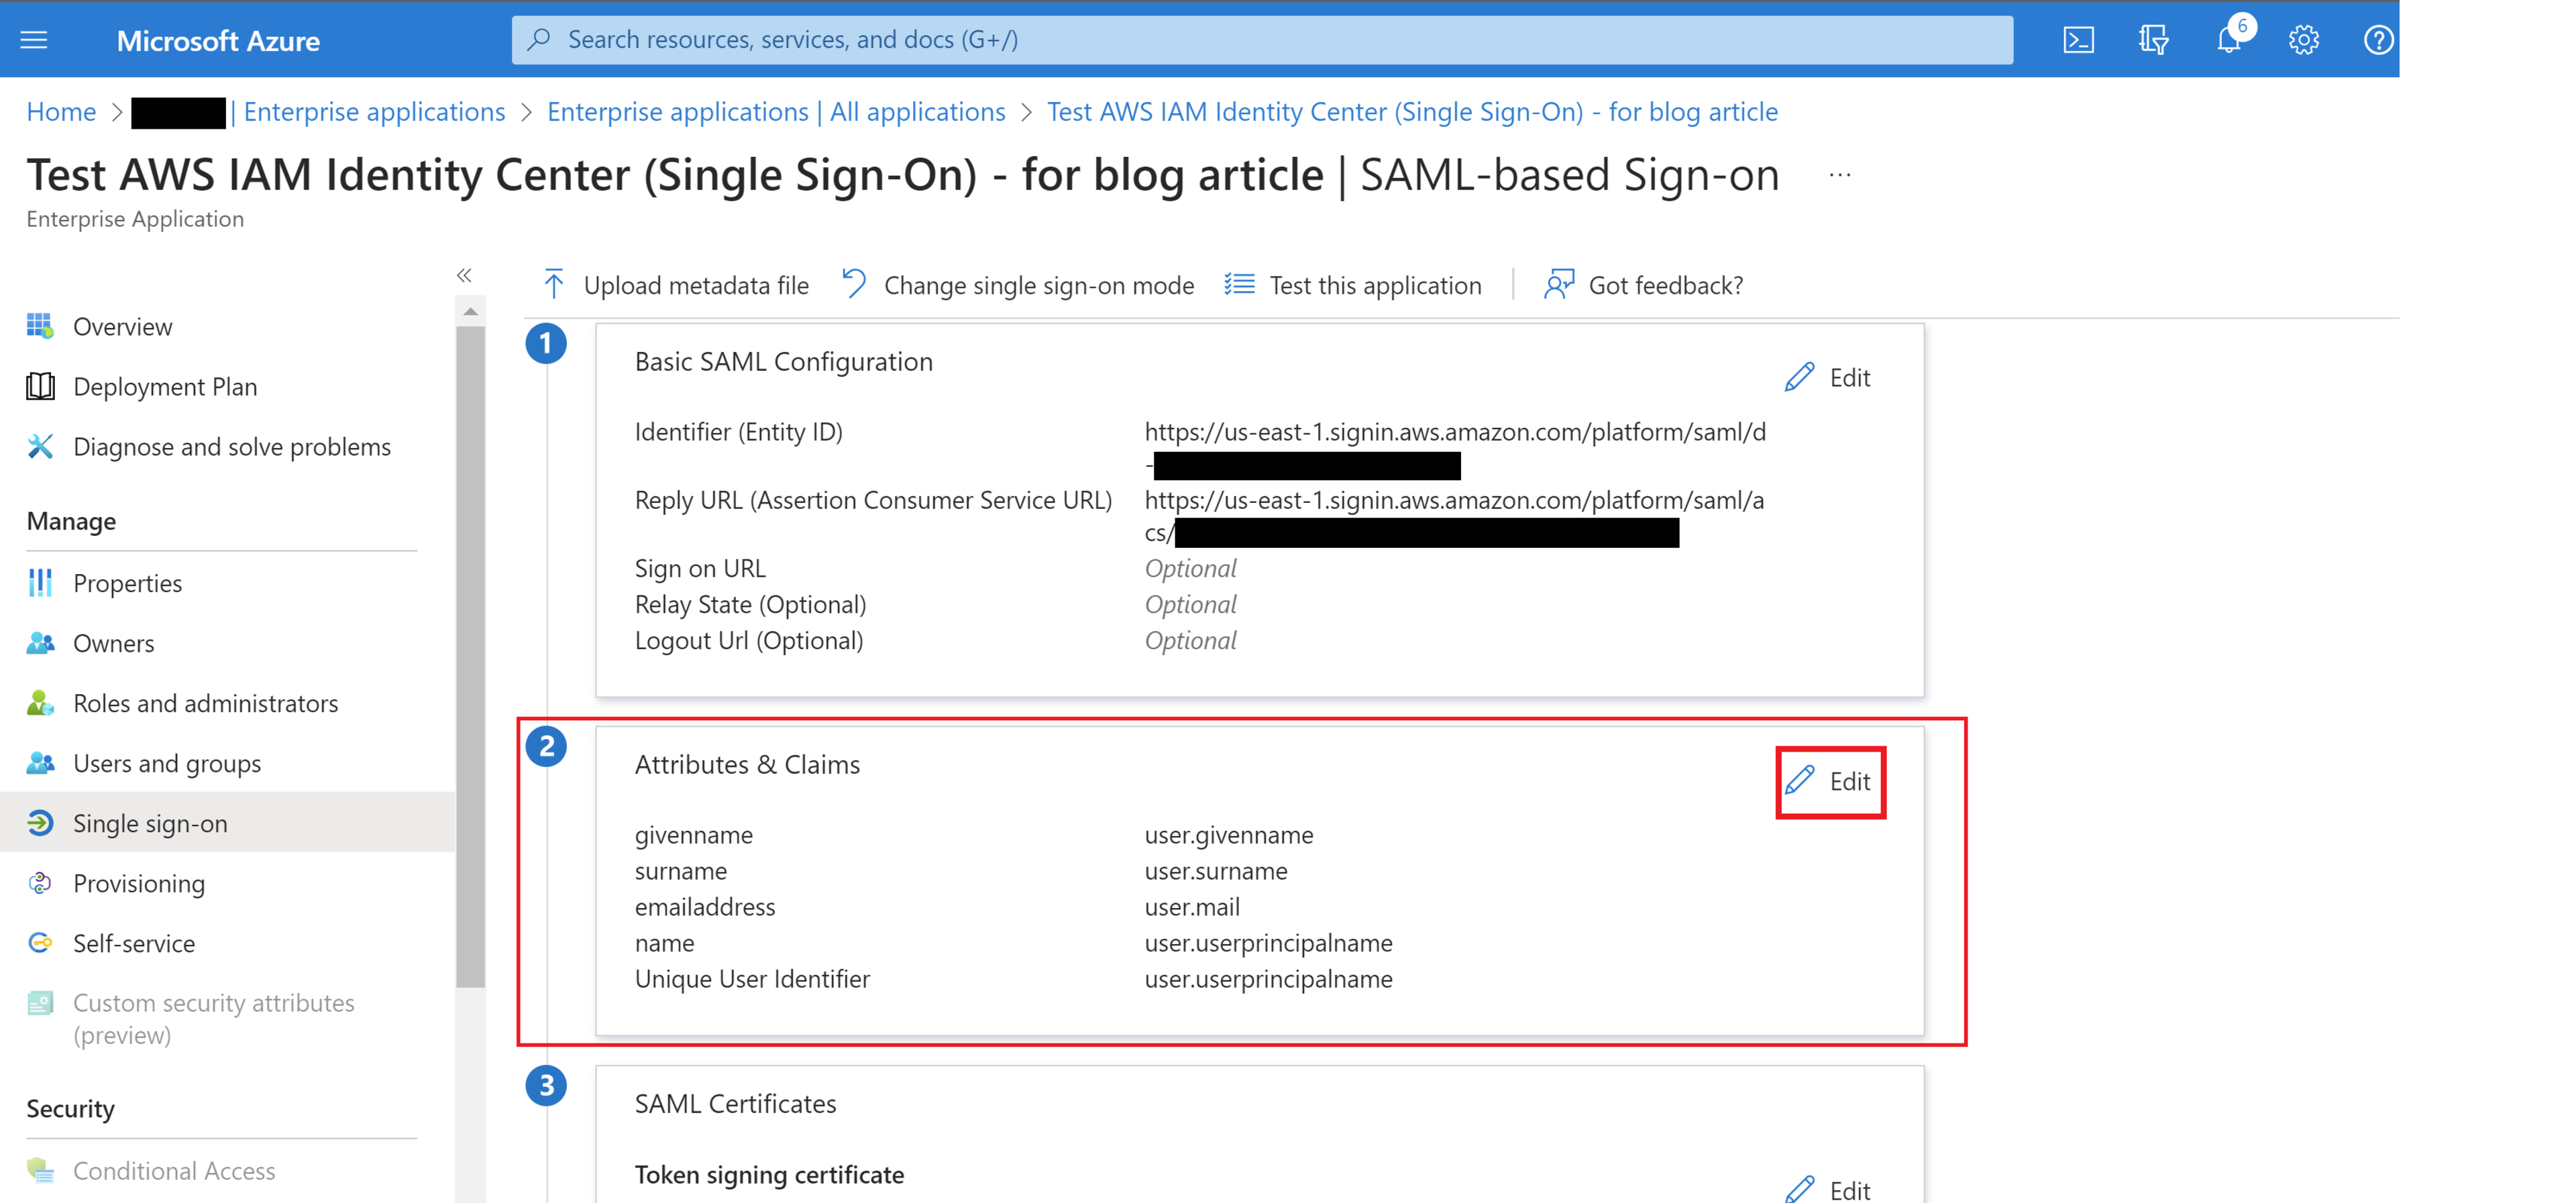
If any of these attributes are not present, click on “Edit” in section 2 “Attributes & Claims”.
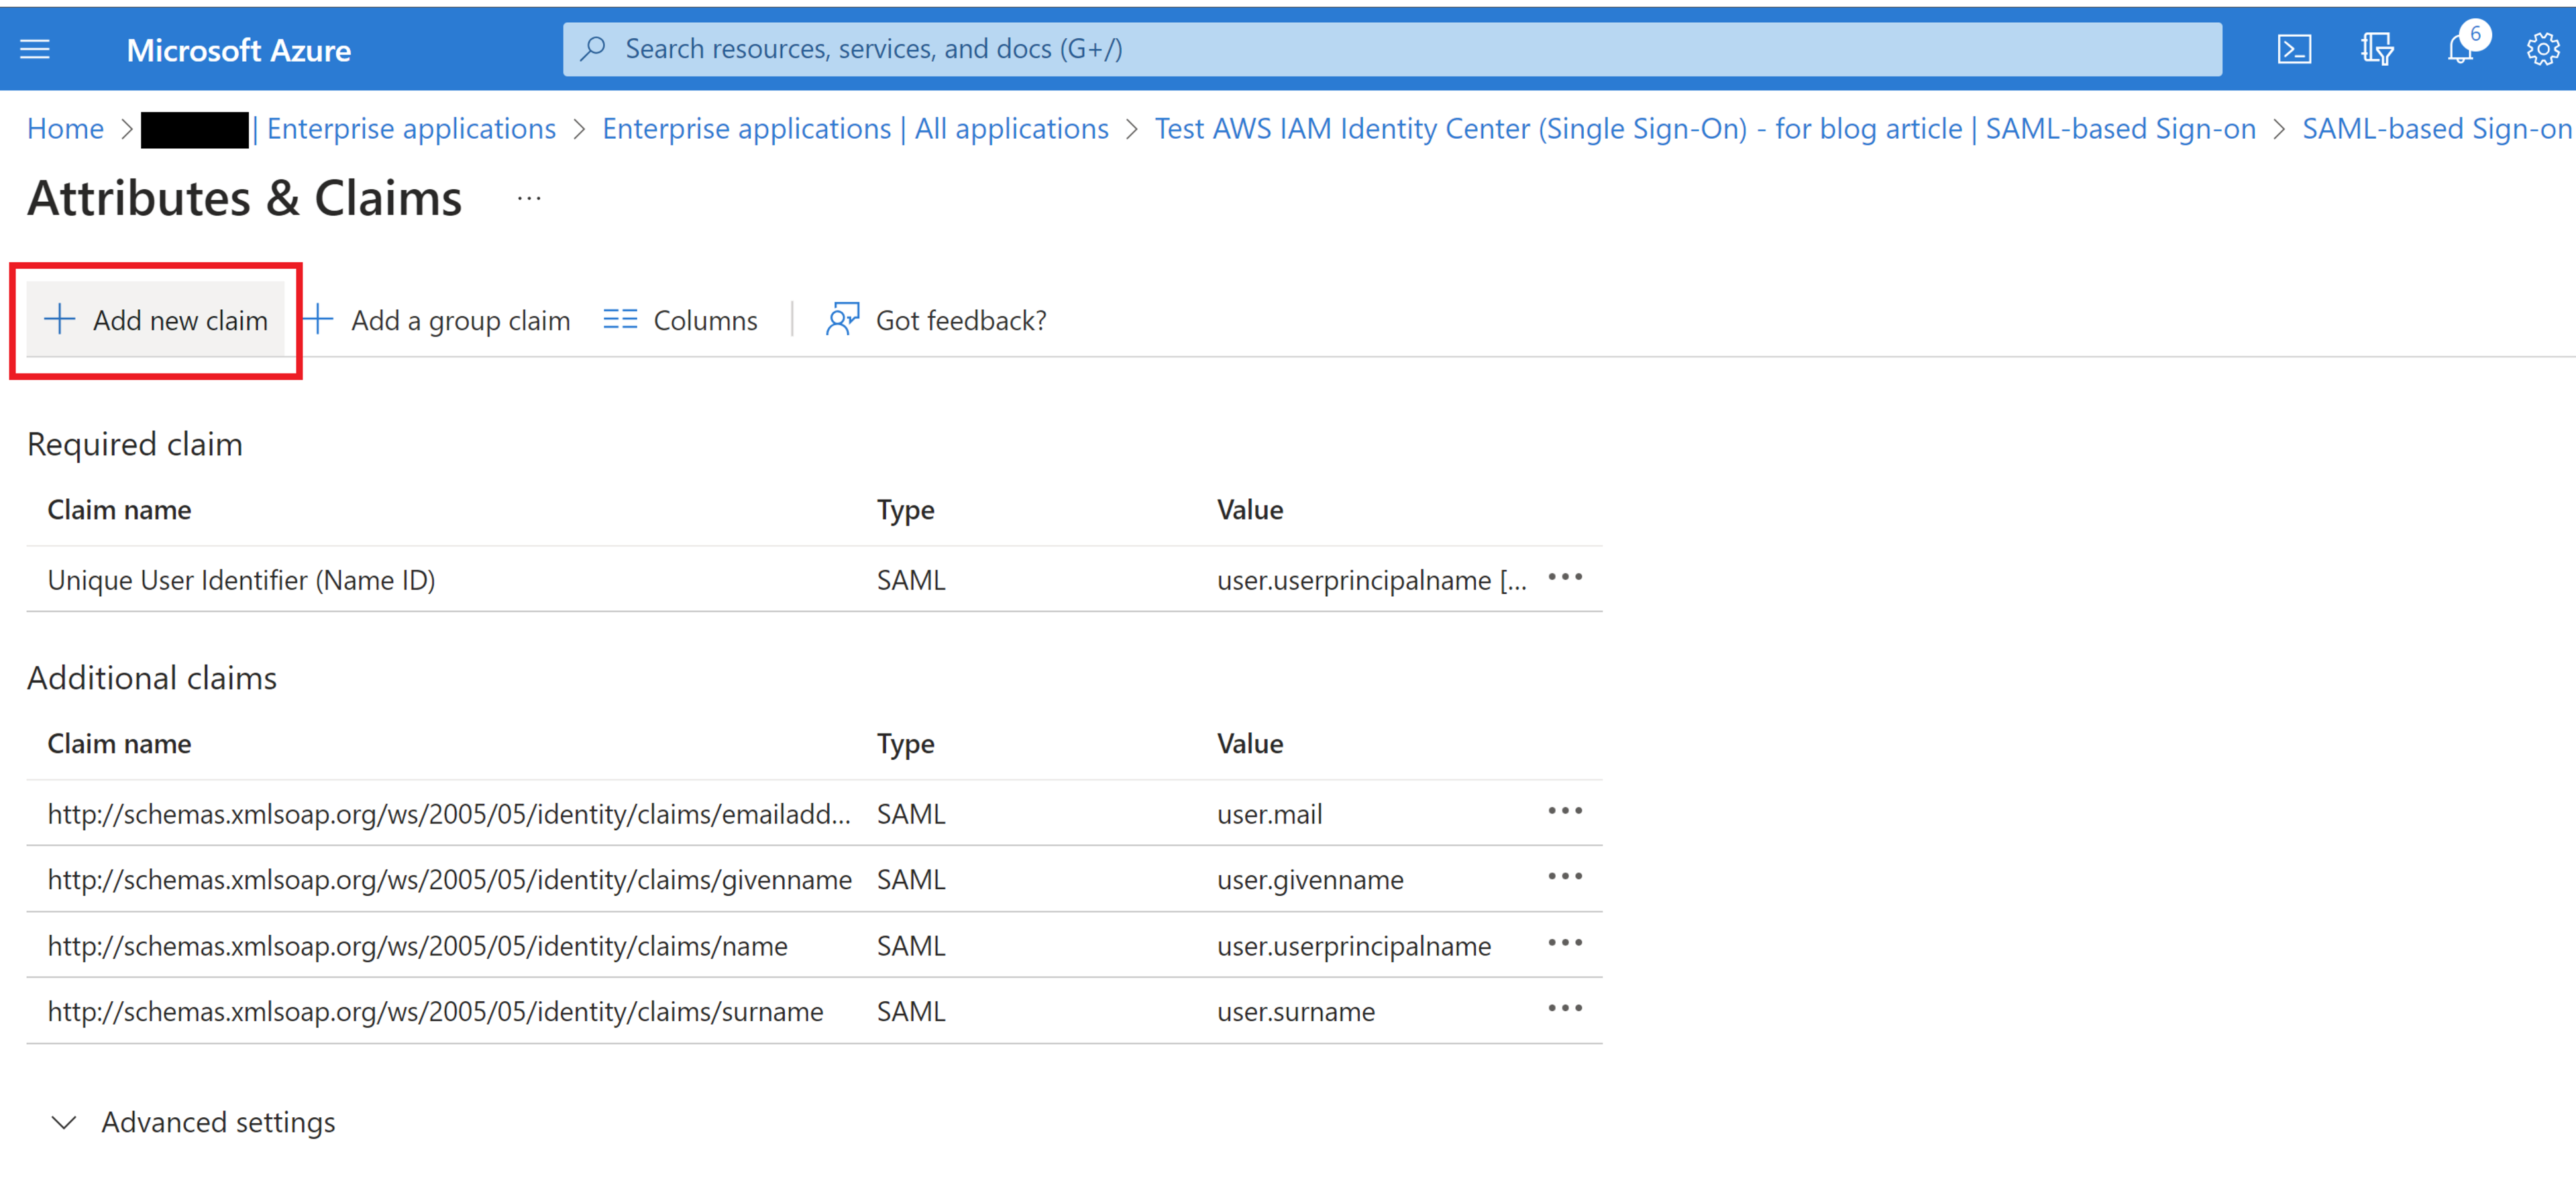
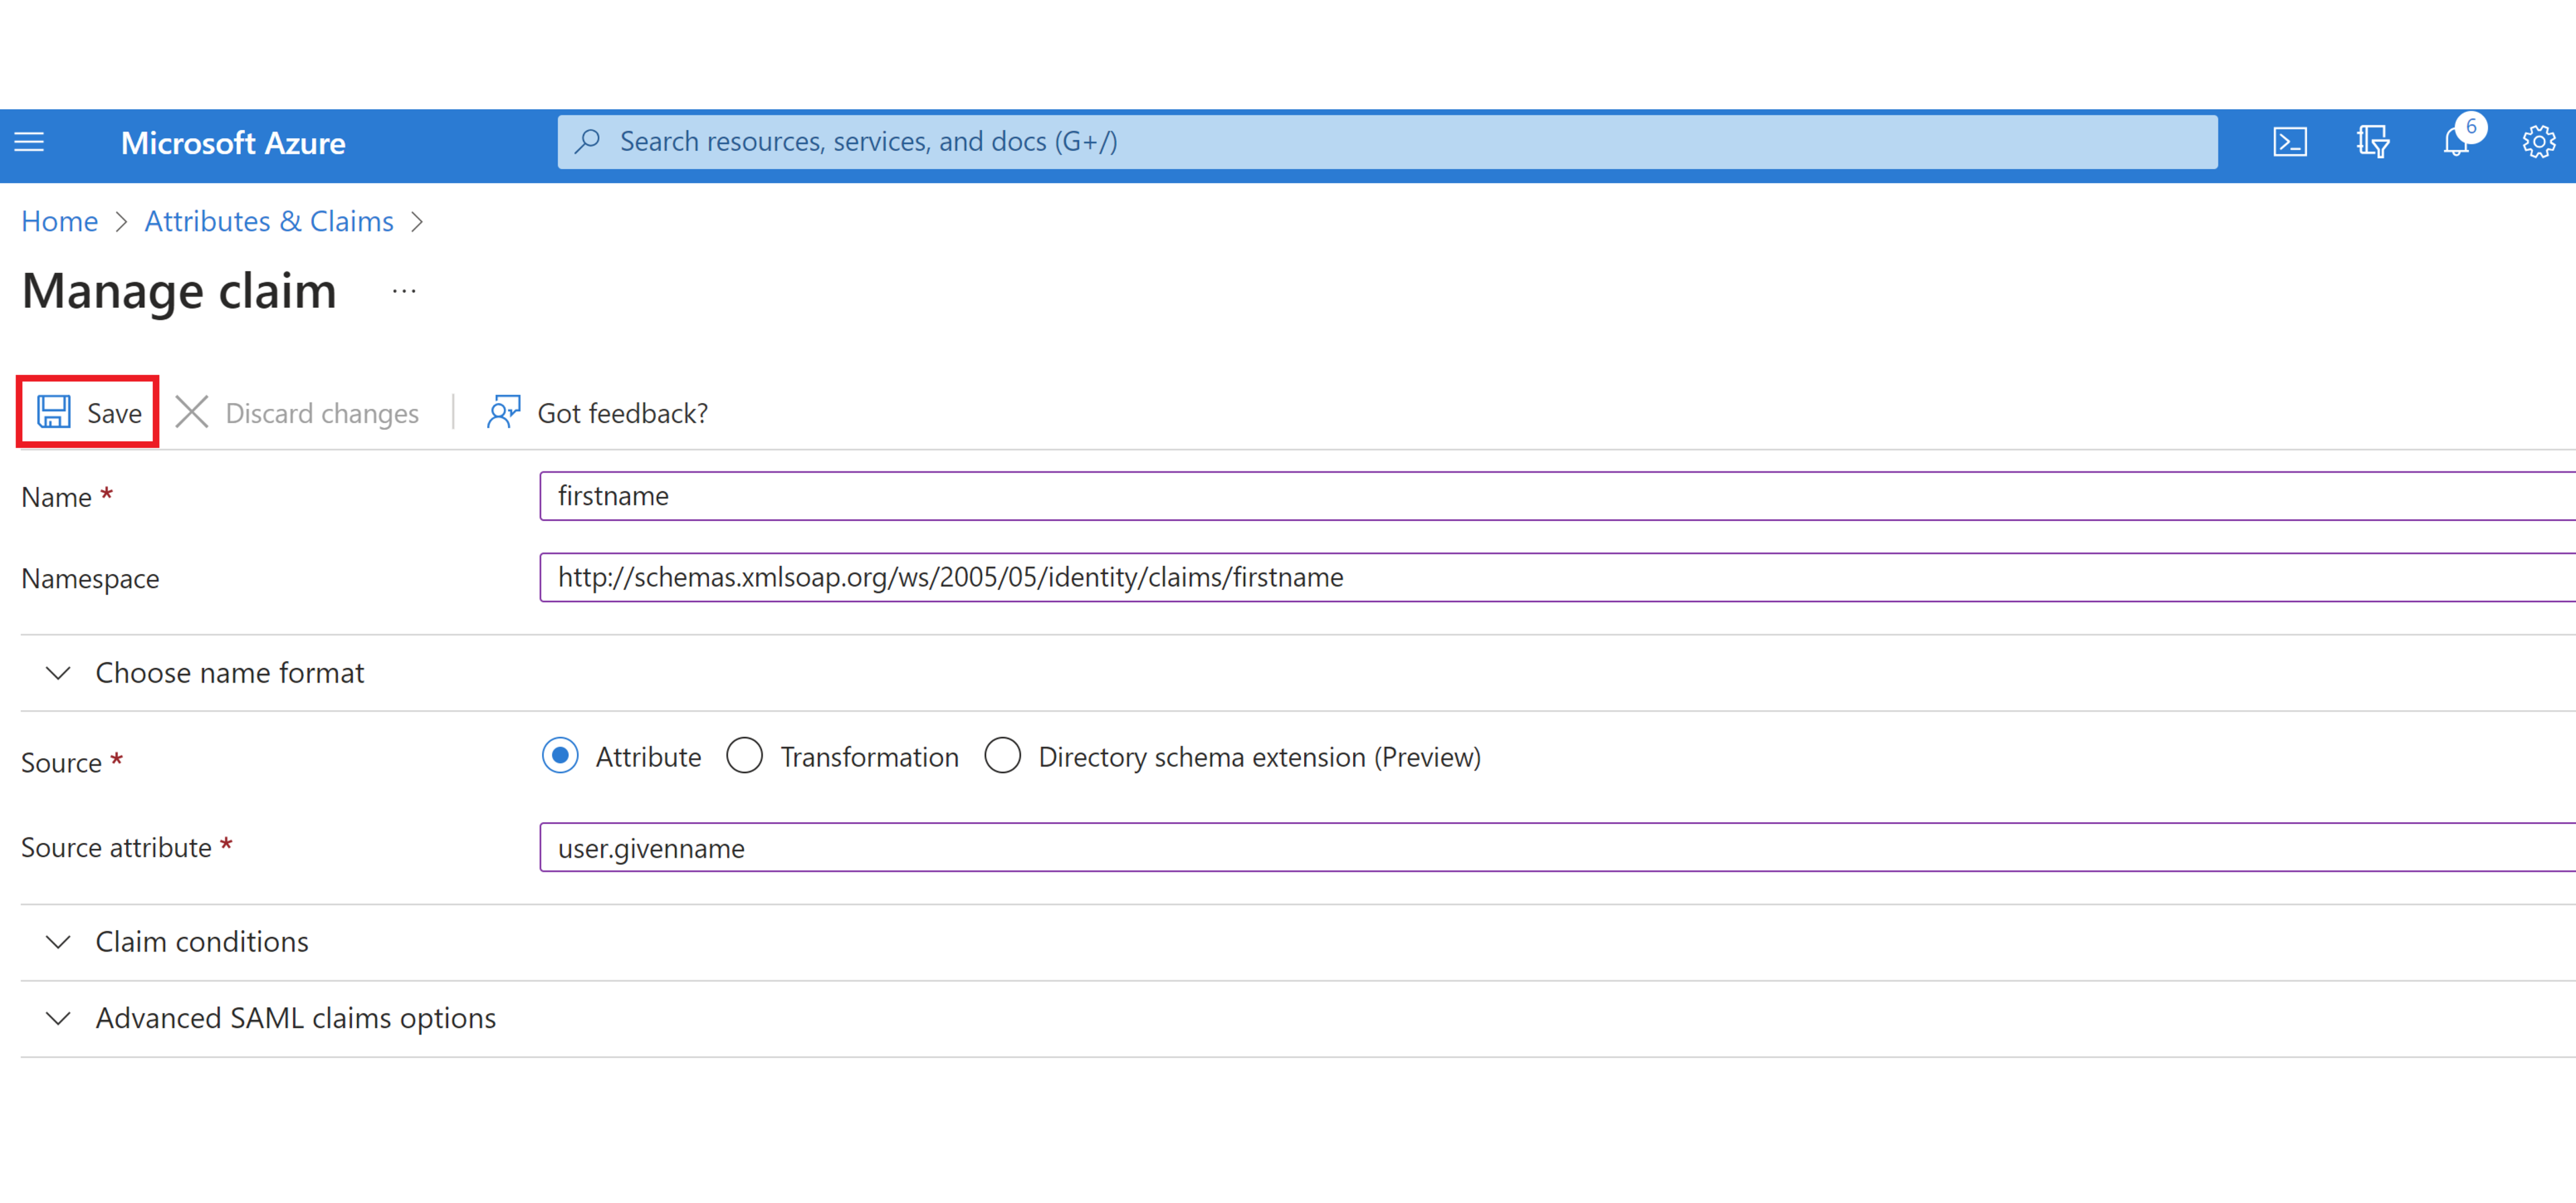
Click “Add new claim”.
Then add the AWS required attribute names in the “Name” box (here we will be adding the “firstname” attribute).
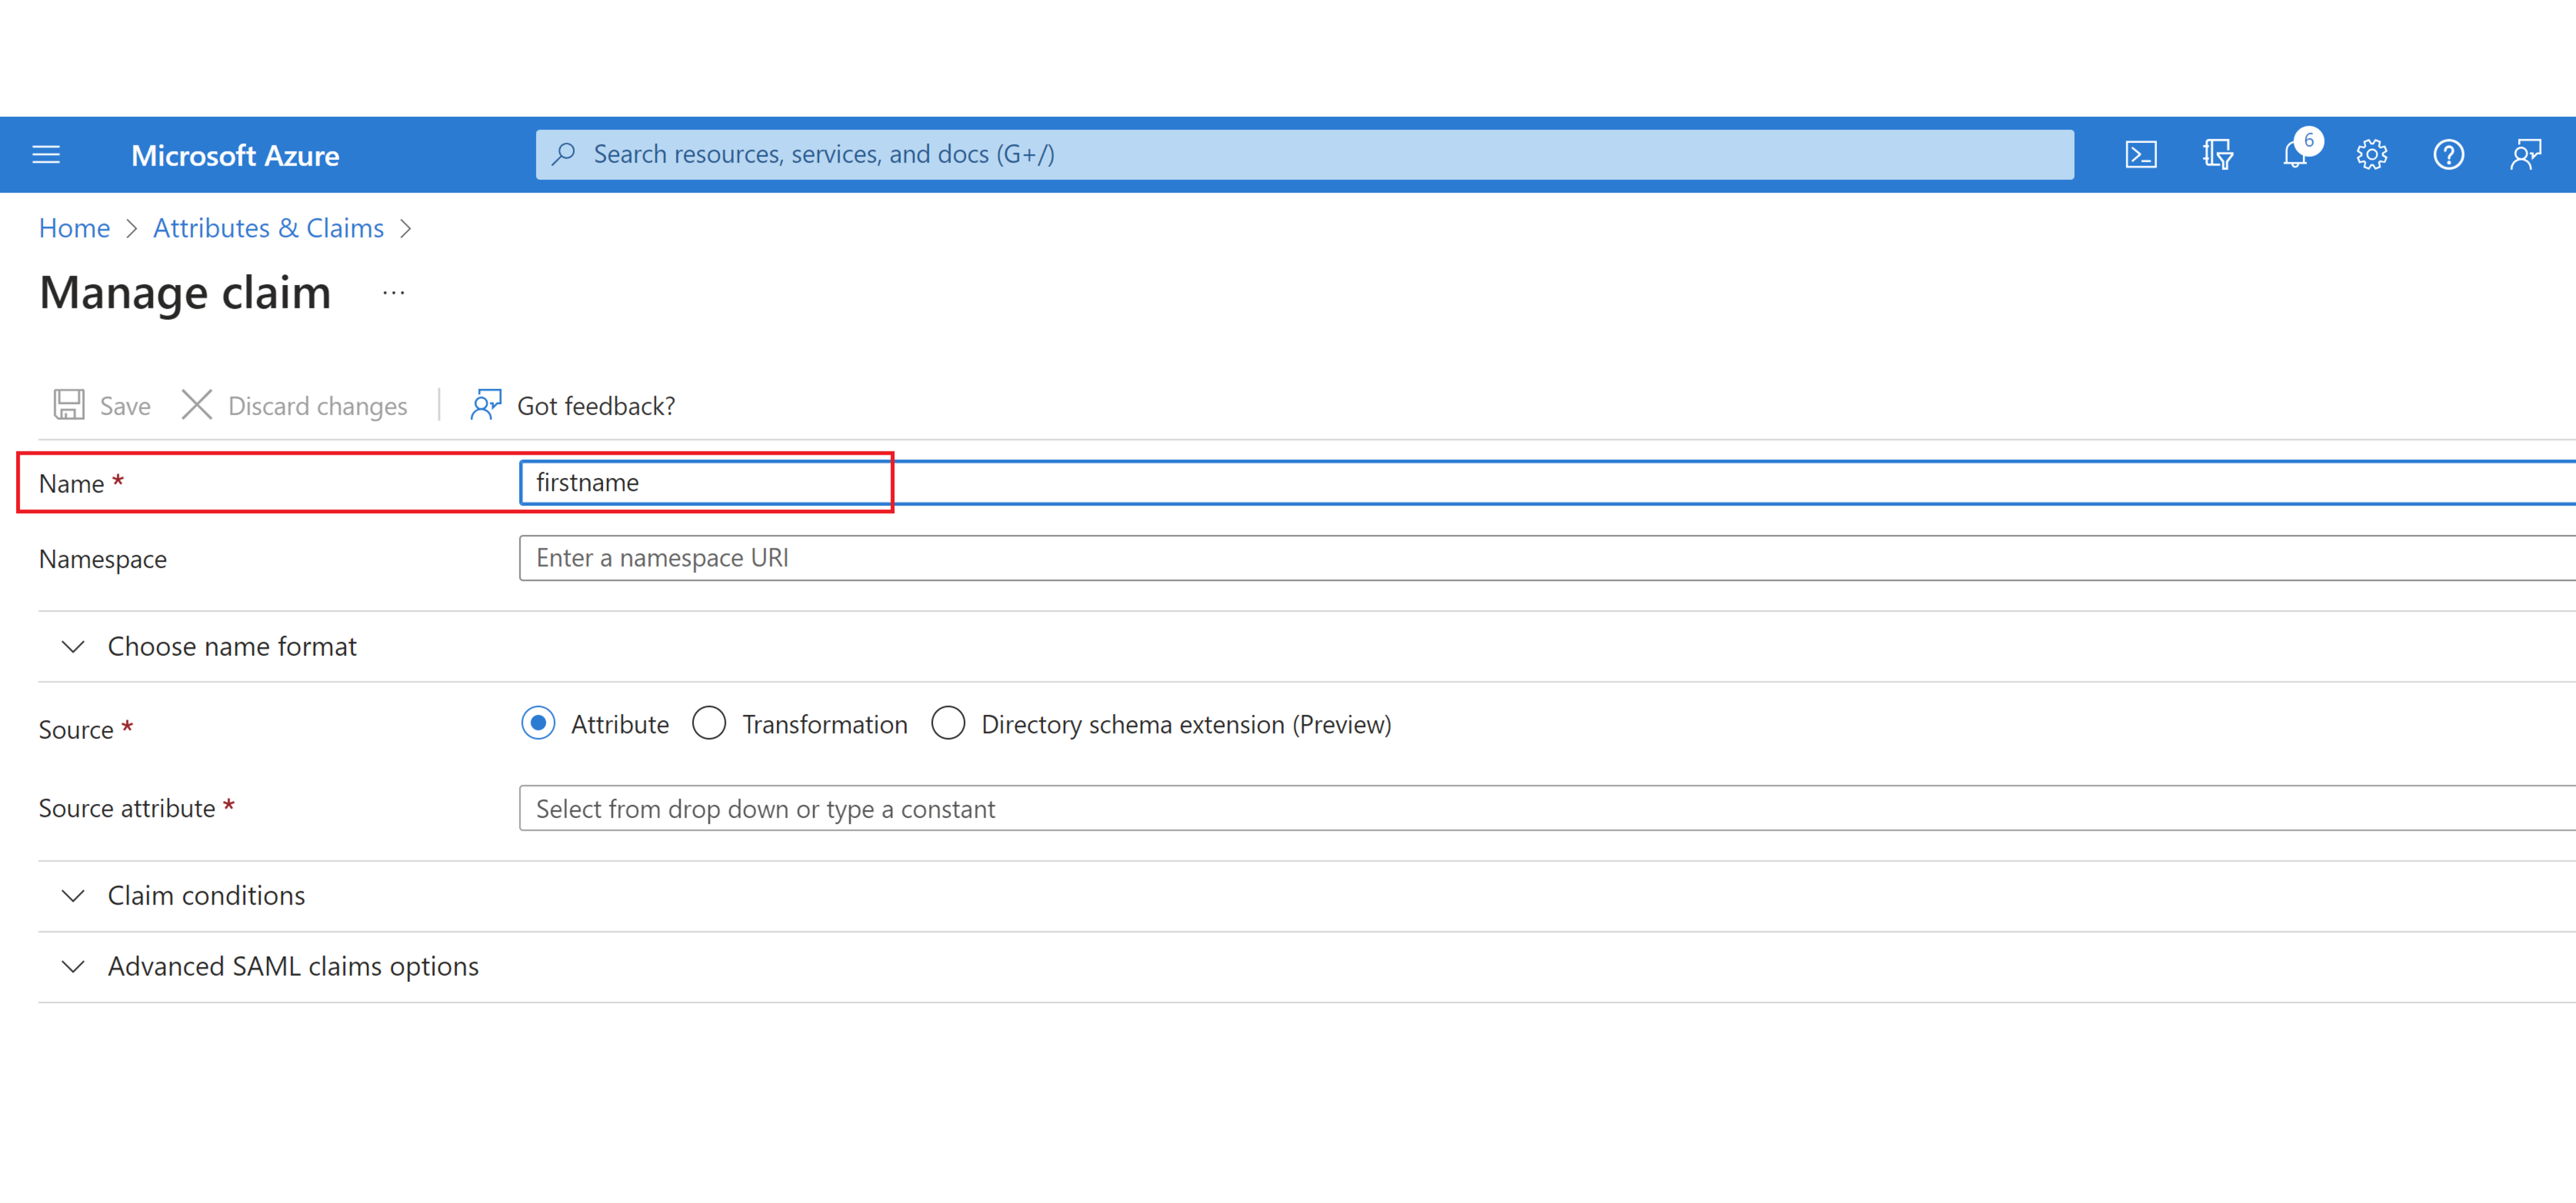
Add the optional “Namespace”. It should be “http://schemas.xmlsoap.org/ws/2005/05/identity/claims".
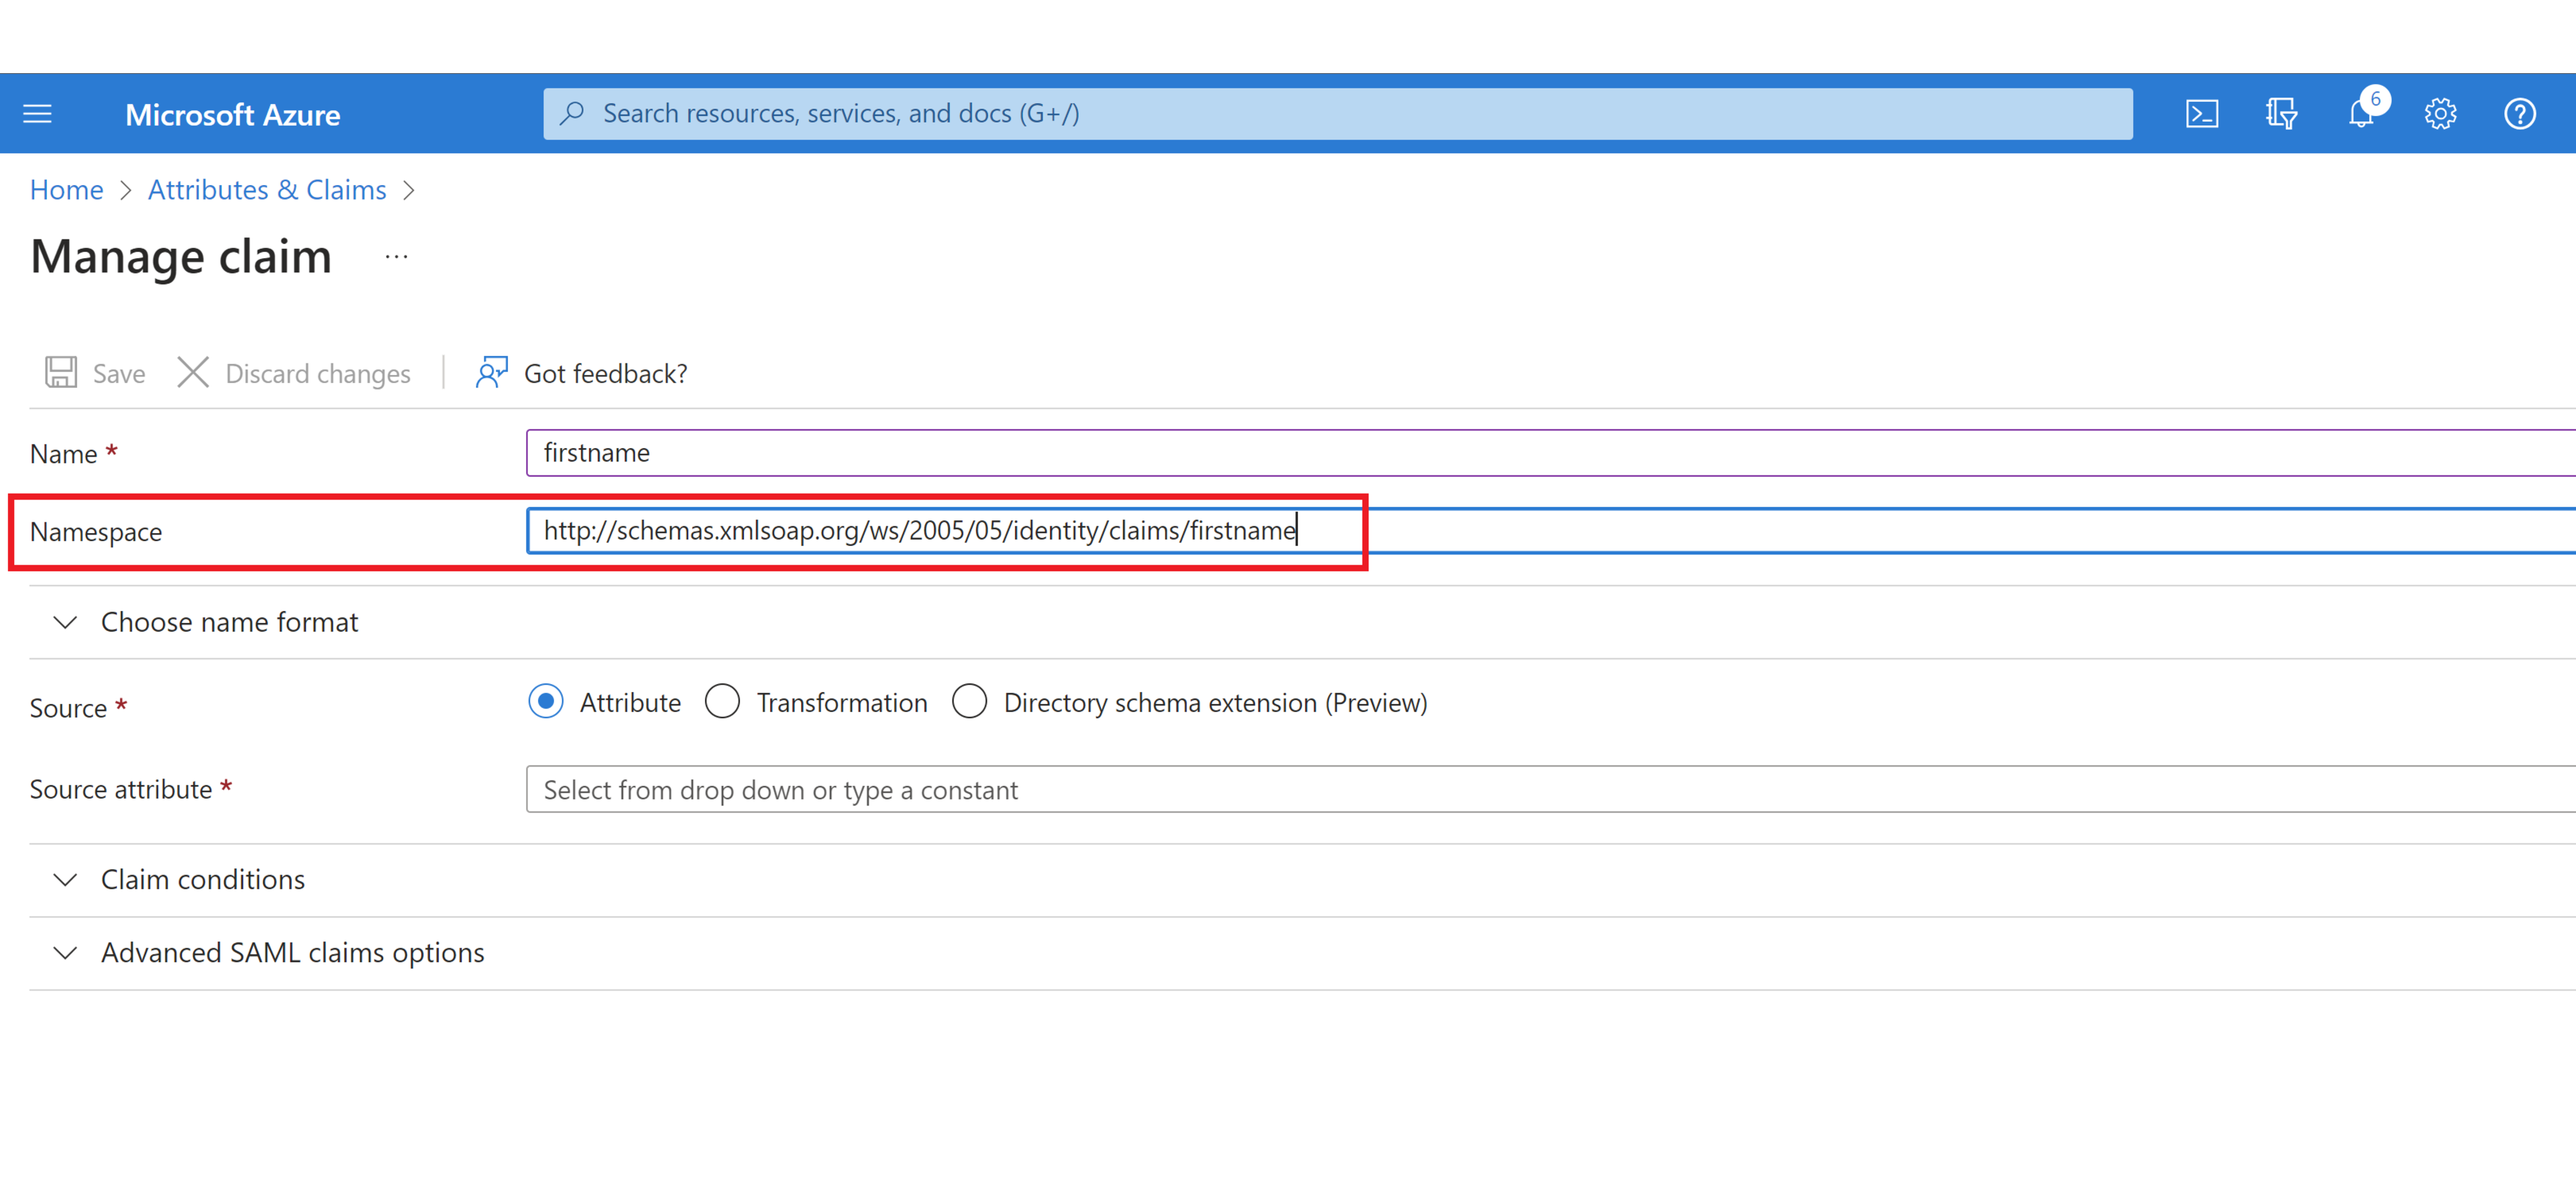
In the “Source” section, select “Attribute” radio button.
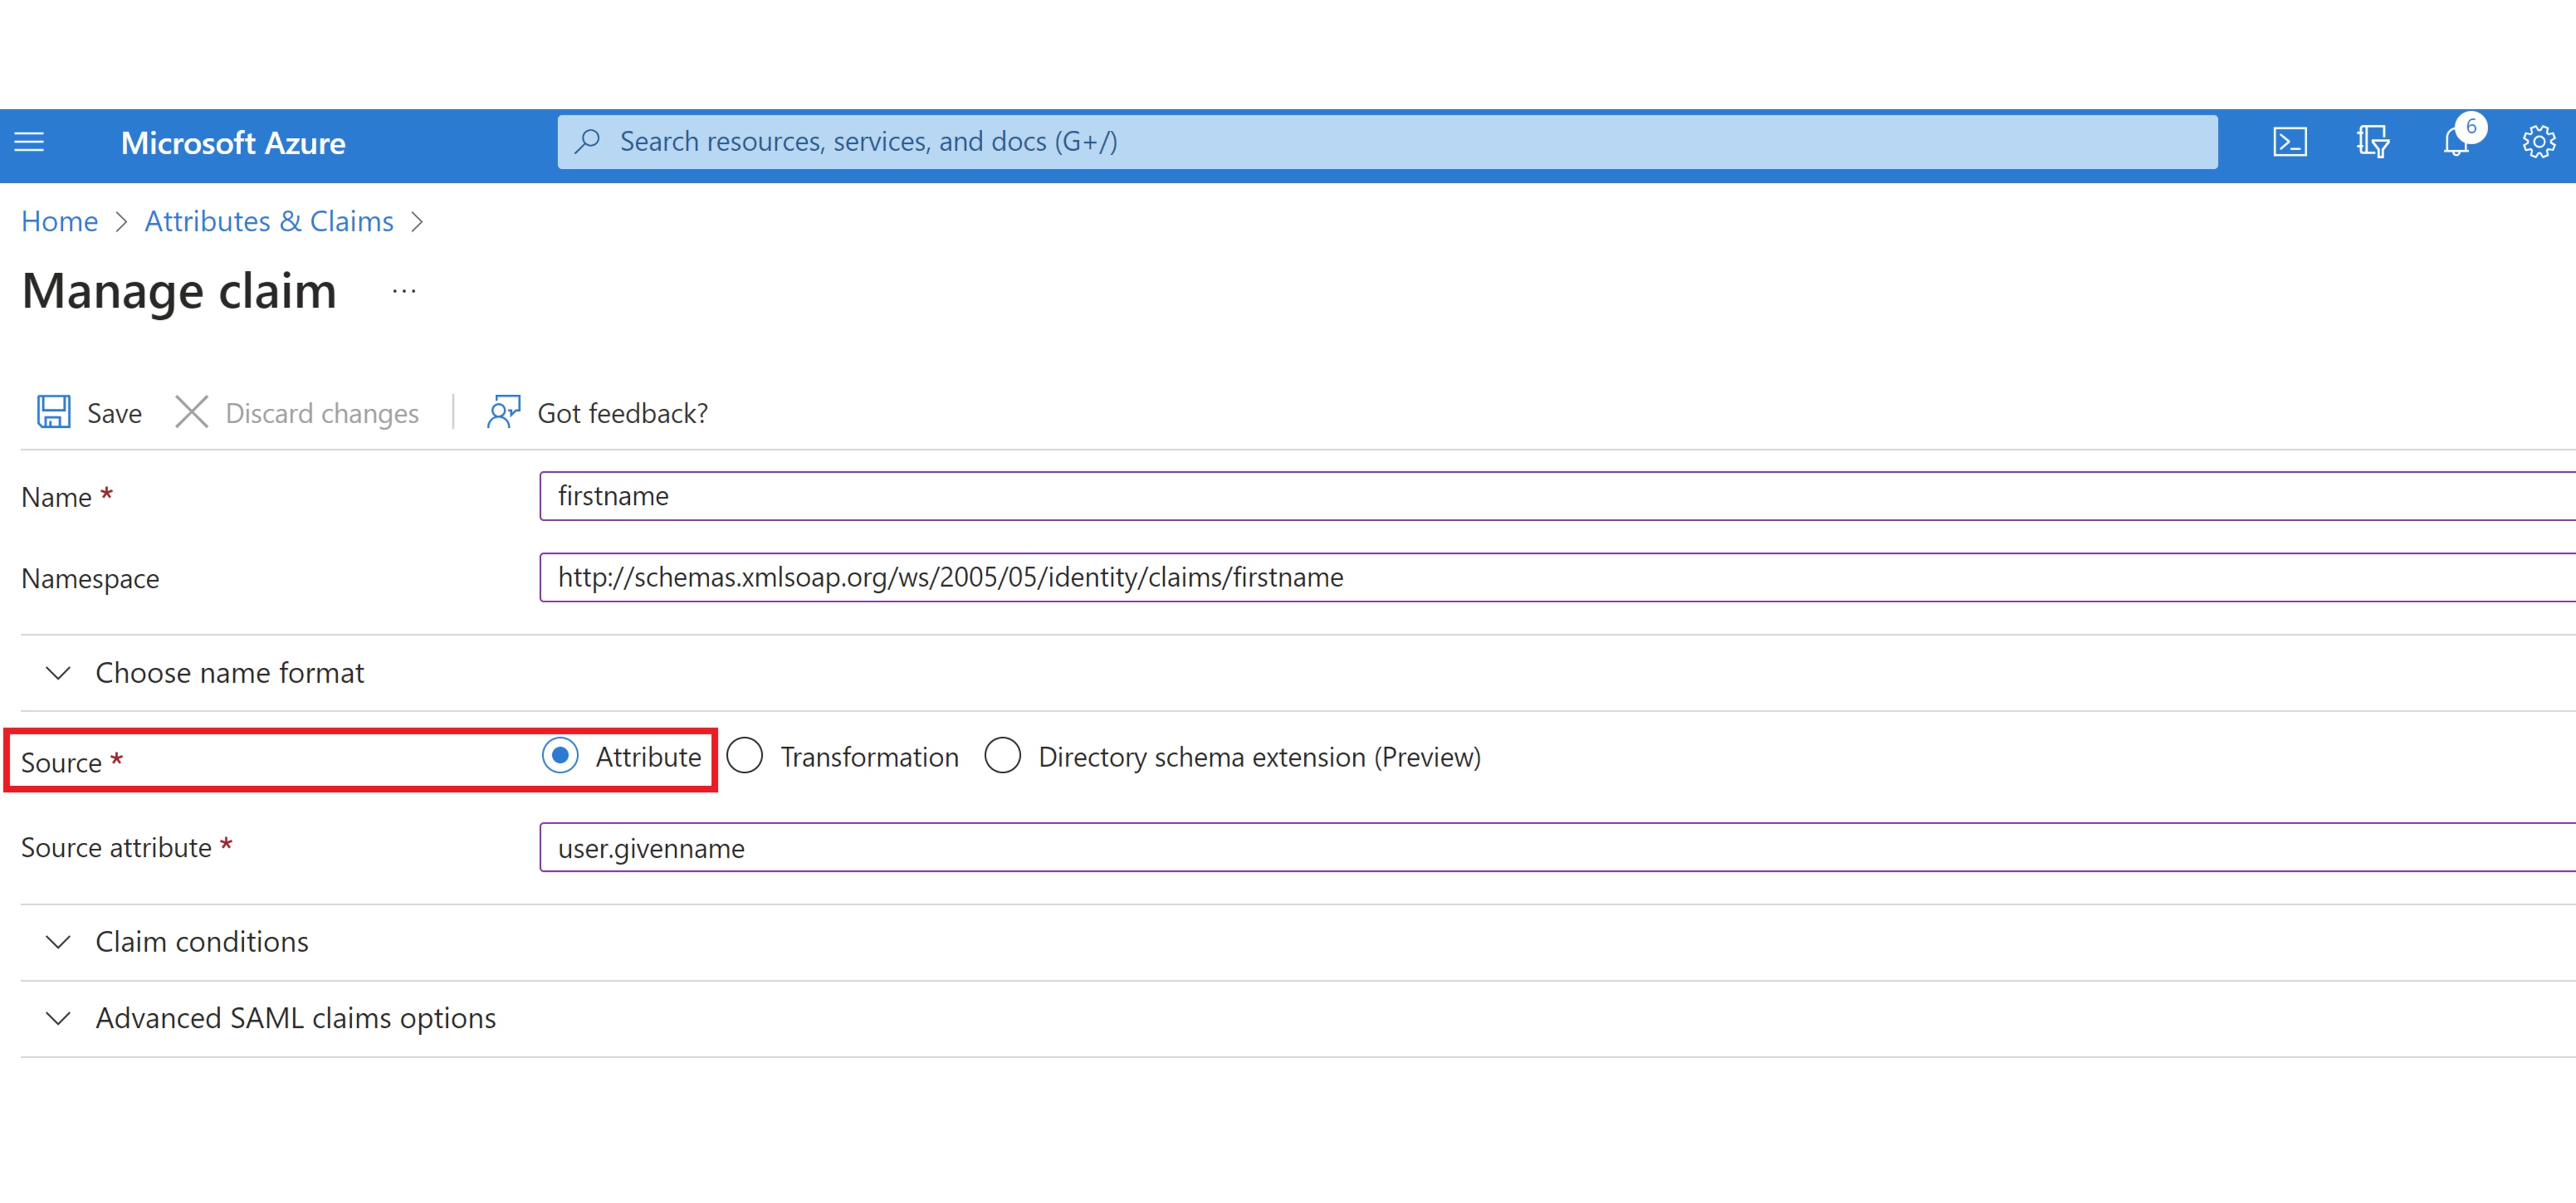
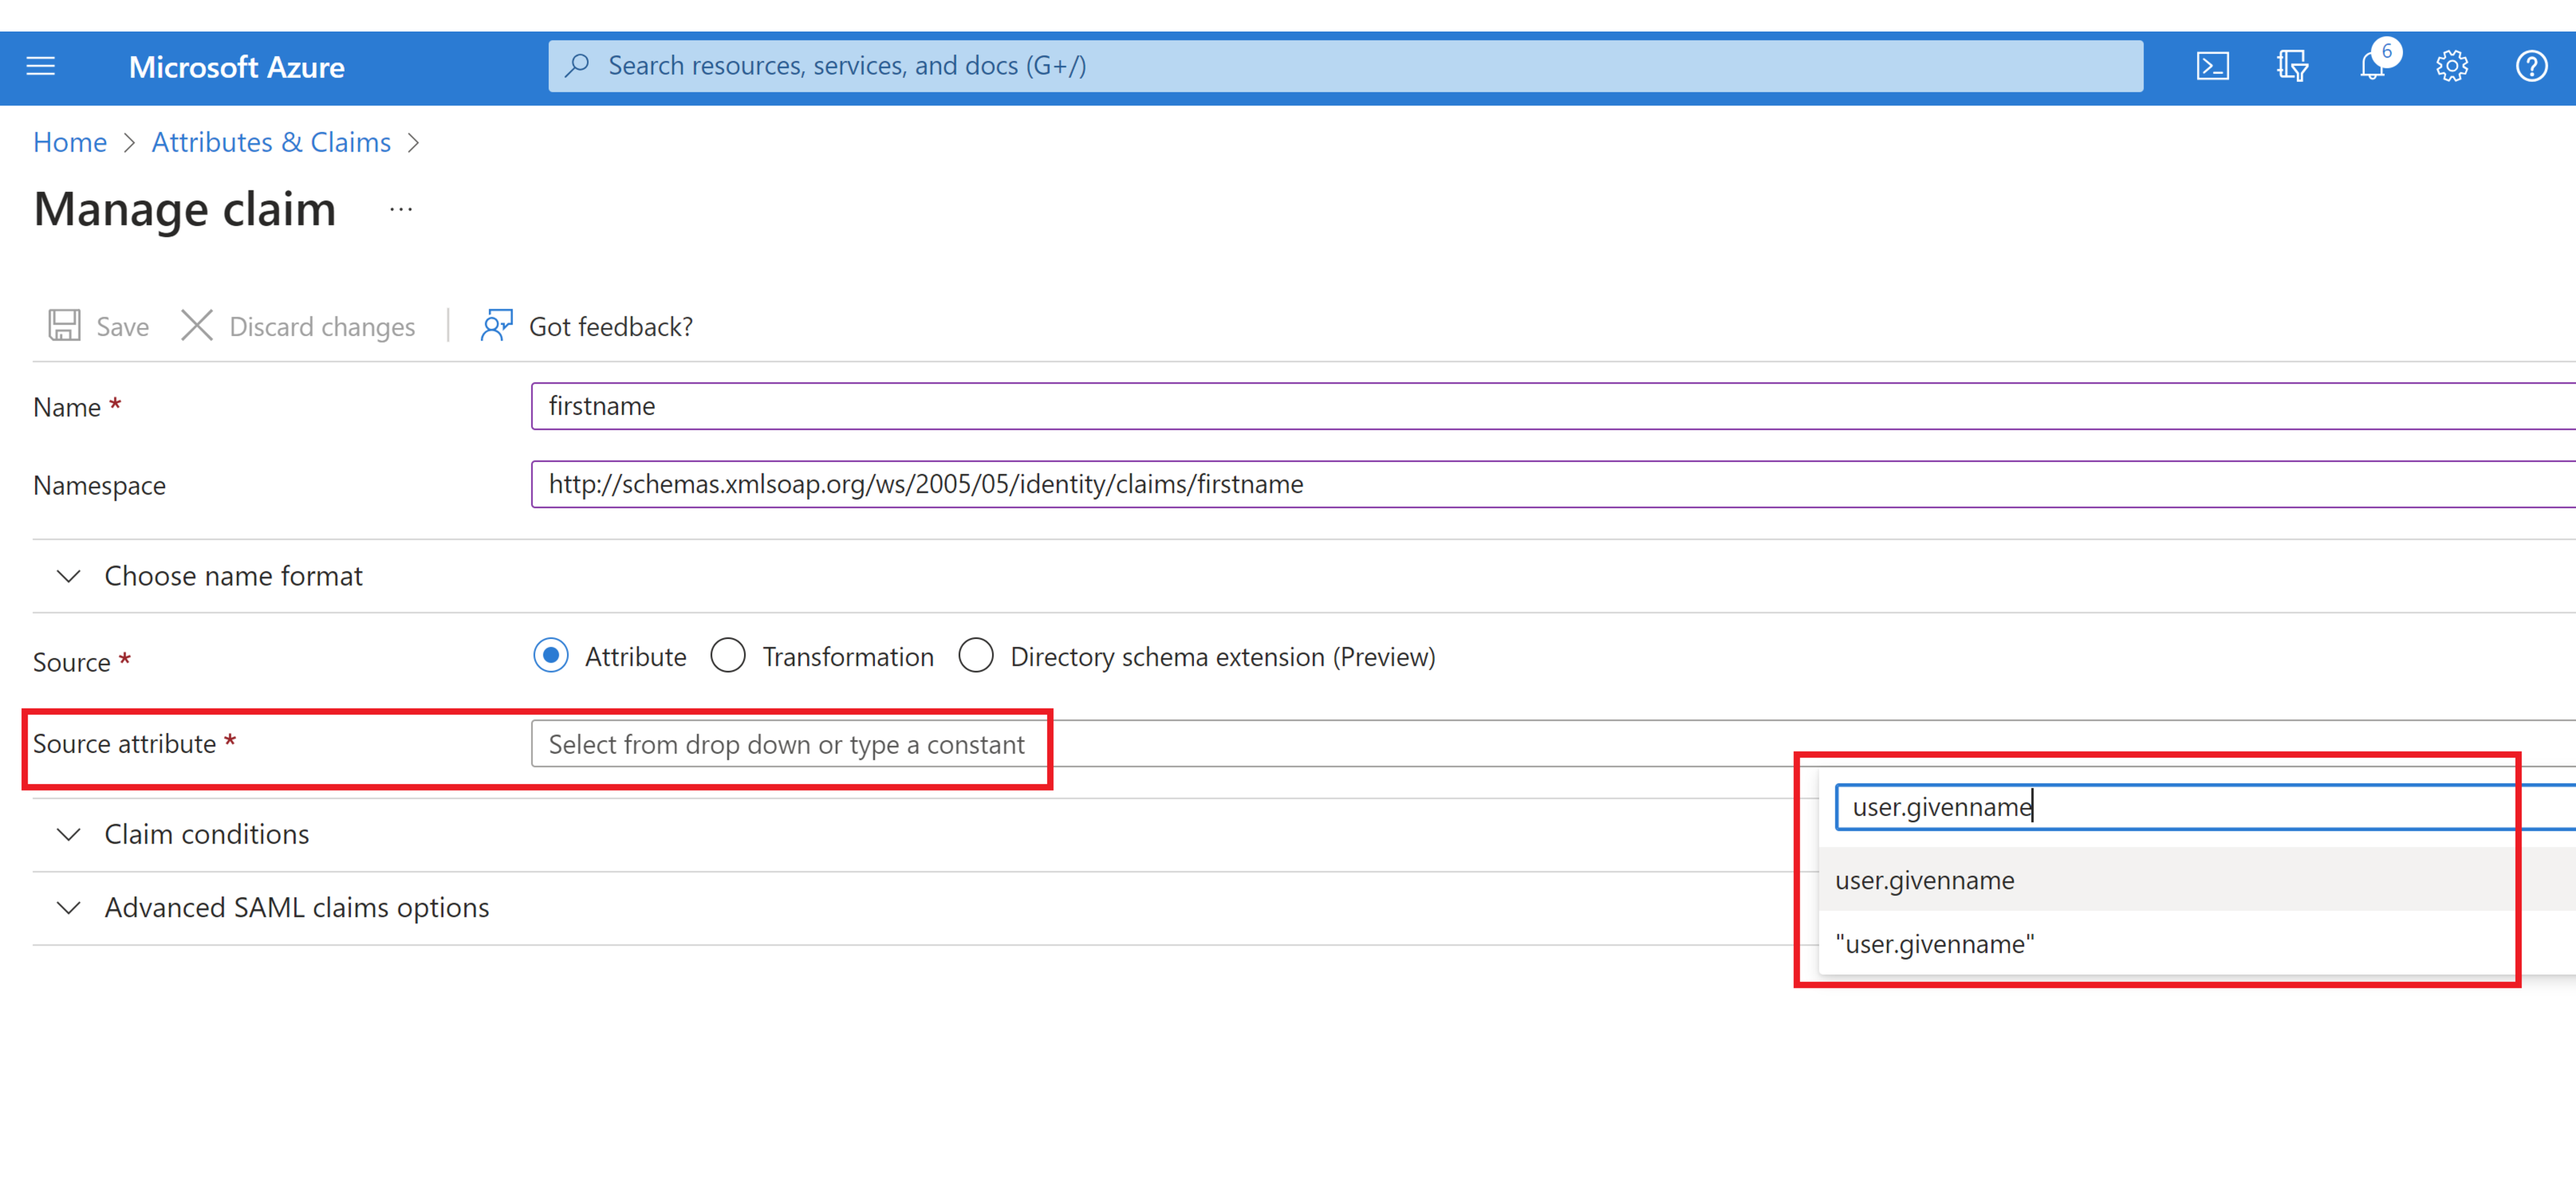
In the “Source Attribute” section, select the associated Azure AD value from the dropdown menu or type it in. In this case it is “user.givenname” per the list above.
Click “Save”.
Repeat steps 4-10 for any additional AWS required attributes that are missing.
Additional information is provided here
All required attributes should now appear in the “Attributes & Claims” section of the “Set up single sign on” page, as seen below.
An additional detail to be aware of is that if any of these required attributes are present, but are not assigned a value in Azure AD (i.e. no email address entered into the email field, no first name entered into the firstname field, etc.), then provisioning will still fail. If this is the case, the missing information will need to be added for any users that lack it in Azure AD.
While integrating Azure AD and AWS IAM Identity Center to enable SSO can be a long and convoluted process, this does not have to be the case. When you are armed with all of the information necessary to complete the process successfully, it can be accomplished quickly, without hours spent on debugging. In this article, I have attempted to capture all of the required steps and details for the part of the process where I found the least information available online.
Without Azure AD providing all of the required attributes and claims, complete with populated information, any integration with AWS IAM Identity Center will fail. It is my hope that this article has informed the reader and will save them time in performing this integration. Due to the ever-changing nature of cloud provider services, it is important to point out that at some time in the future, there may be steps that are missing or changed from what is outlined in this article.